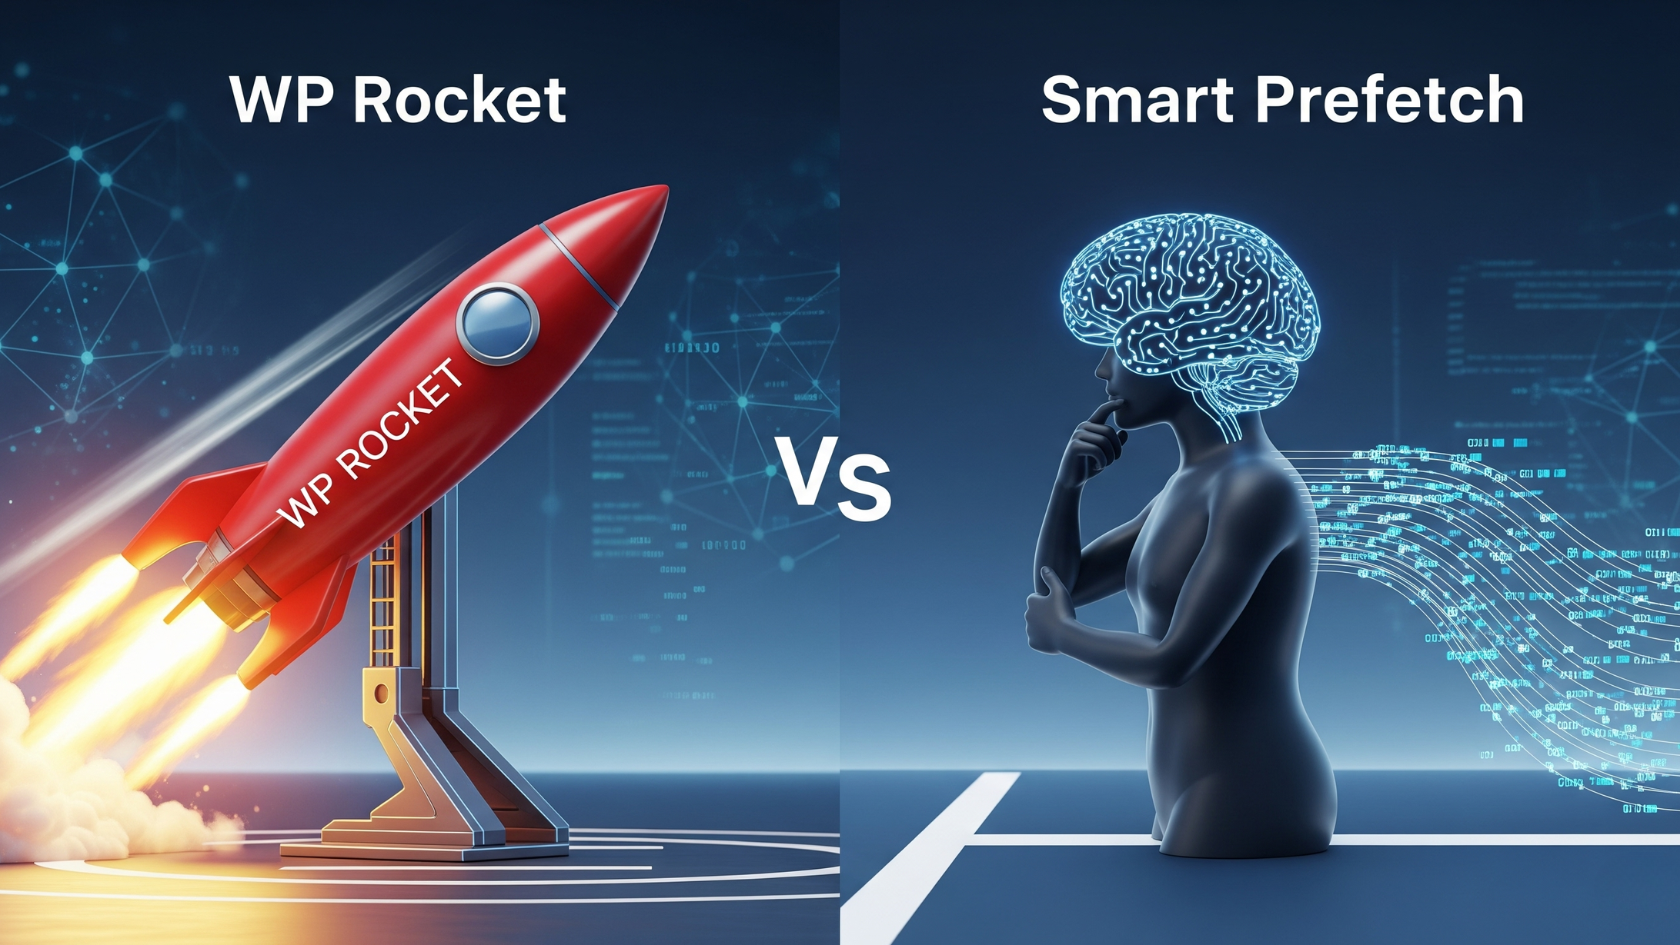
For years, we’ve been obsessed with initial page load speed, throwing caching, CDNs, and minification at the problem. But we’ve been ignoring half the equation: the user’s journey after they land. In this deep dive, I’ll show you why pitting tools like WP Rocket against Smart Prefetch is a mistake and reveal the powerful stack I use to optimize the entire user experience, from first load to final click.
Key Takeaways
- Initial Load vs. Navigation: Understand the crucial difference between optimizing for a user’s first page view (the “first impression”) and optimizing for their subsequent clicks (the “user journey”).
- Different Tools, Different Jobs: WP Rocket, Nitropack, and RabbitLoader are masters of the initial load, focusing on caching, asset optimization, and CDN delivery. Smart Prefetch is a specialist for making in-session navigation feel instant through predictive prefetching.
- The “And” Strategy: The ultimate performance stack doesn’t choose between these tools; it combines an initial load optimizer WITH a predictive prefetcher for a holistically fast experience.
- Core Web Vitals Synergy: This combined approach is designed to crush Largest Contentful Paint (LCP) on landing, and then dramatically improve the perceived speed and Interaction to Next Paint (INP) during navigation.
My Obsession with Speed Scores (And What I Was Missing)
I admit it. For the longest time, my web performance journey was a quest for a single, glorious number: 100. I was obsessed with Google PageSpeed Insights. I’d spend hours in my WP Rocket dashboard, toggling settings for minification, deferring JavaScript, and configuring my CDN. I celebrated every green checkmark, every millisecond shaved off my Largest Contentful Paint (LCP). And on the day I finally hit that perfect score for techvigil.com, I felt like I had conquered the web.
My site was, by all lab-tested metrics, a rocket. The first page a user landed on from Google search loaded in a blink. It was a masterpiece of optimization.
But then I did something I hadn’t done in a while: I just used my website. I navigated it like a real user. I clicked from my homepage to a blog post. Then from that post to my “About” page. And that’s when the illusion shattered.
Despite the lightning-fast initial load, every subsequent click had a noticeable, jarring delay. It wasn’t slow, not by 2015 standards, but it wasn’t instant. There was that brief, frustrating moment of a white screen flash before the next page rendered. My rocket-fast site felt… clunky.
That was my “aha!” moment. I realized I had only optimized half of the user experience. I had poured all my energy into winning the battle, but I was completely ignoring the war.
The Two Fronts of Web Performance
This experience led me to a new framework for thinking about site speed, one that has completely changed my approach. I now see web performance as a war fought on two distinct fronts:
- Front #1: The First Impression (Initial Page Load). This is the moment a user clicks a link from a search result, a social media post, or an ad and lands on your site for the first time. The goal here is to get from a blank screen to a fully interactive and stable page as quickly as humanly possible. This is the battleground for Core Web Vitals like Largest Contentful Paint (LCP) and Cumulative Layout Shift (CLS). It’s your site’s digital curb appeal; if you fail here, the user bounces before they even see what you have to offer. A staggering 53% of mobile visitors will leave if a page takes longer than 3 seconds to load.
- Front #2: The User Journey (In-Session Navigation). This is every click, tap, and interaction after the user has landed. It’s the journey from your homepage to a product page, from a blog post to your contact form. The goal here is to make the entire session feel seamless, fluid, and instantaneous. This is where perceived performance and the newest Core Web Vital, Interaction to Next Paint (INP), become the primary metrics of success.
For too long, the entire web performance industry-myself included-has been myopically focused on Front #1. We’ve been conditioned by the tools we use and the metrics we’re told to track. The very marketing of performance plugins has always centered on “faster load times” and “better PageSpeed scores,” which are almost exclusively measures of the initial load.
Google’s initial rollout of Core Web Vitals, with its heavy emphasis on LCP, further cemented this focus. But the game has changed. The replacement of First Input Delay (FID) with INP in March 2024 was a monumental signal from Google. FID was a flawed metric that only measured the input delay of the very first interaction. INP, on the other hand, measures the responsiveness of all interactions throughout the user’s entire session, including those that happen during navigation to a new page.
This shift is Google’s official acknowledgment that the post-load user journey is critically important and was previously under-measured. A performance strategy that only optimizes the initial load is now officially incomplete. This article is about how to build a complete strategy-how to win on both fronts.
The Gatekeepers: Mastering the First Impression with WP Rocket, Nitropack, & RabbitLoader
Before we can even think about the user journey, we have to nail the first impression. This is non-negotiable. If a user bounces, they never get to take a journey. This is where the “all-in-one” performance suites come in. I call them the Gatekeepers. Their job is to ensure that when a visitor arrives at your digital doorstep, the door opens instantly to a fully-formed, welcoming experience.
Tools like WP Rocket, Nitropack, and RabbitLoader are the undisputed champions of initial load optimization. While they have different approaches, they all work by tackling the same fundamental pillars of performance.
The Core Pillars of Initial Load Optimization
To understand how these tools work, you need to understand what slows a typical WordPress site down. When a user requests a page, your server has to execute PHP code, make multiple queries to your database, assemble the HTML document, and then send it to the browser. The browser then has to parse that HTML, discover it needs CSS, JavaScript, and images, and then fetch all of those assets. It’s a long, complex process. The Gatekeepers brutally streamline this process.
Caching Demystified
This is the absolute cornerstone of web performance. A caching plugin pre-builds a static HTML version of your page. When a user visits, the server can just send this ready-made file instead of going through the whole PHP and database dance. It’s the difference between a chef cooking your meal from scratch every time you order versus having it perfectly prepared and ready to serve the moment you sit down. All three tools provide robust
Page Caching, as well as Browser Caching (which stores files on the user’s device for repeat visits) and GZIP/Brotli Compression (which zips up files to make them smaller for transfer).
Asset Optimization
This is about making your CSS and JavaScript files smaller and loading them in a smarter way.
- Minification & Combination: This involves stripping out all the unnecessary characters (spaces, comments) from your code to reduce file size. Combining multiple files into one reduces the number of round-trips the browser has to make to your server.
- Defer/Delay JavaScript: This is a game-changer. It tells the browser not to load or execute non-essential JavaScript until after the main content of the page has rendered, or even until the user starts interacting with the page (like scrolling). This directly prevents scripts from blocking the initial render, which is a major cause of poor LCP.
- Critical CSS: This technique identifies the absolute minimum CSS needed to style the “above-the-fold” content and loads it first, allowing the user to see a styled page almost instantly while the rest of the CSS loads in the background.
Media Handling
Images are often the heaviest part of a webpage. These tools tackle them with:
- Lazy Loading: This prevents images and videos that are “below the fold” from loading until the user actually scrolls down to them. This dramatically reduces the initial page weight.
- Image Optimization & WebP Conversion: Many of these tools (especially the cloud-based ones) will automatically compress your images and convert them to modern, efficient formats like WebP, which are significantly smaller than JPEGs or PNGs.
The Role of the CDN
A Content Delivery Network (CDN) is a network of servers distributed across the globe. These tools integrate with a CDN to store copies of your assets (images, CSS, JS) on these servers. When a user in London visits your site hosted in Texas, the CDN serves the assets from a server in or near London, not Texas. This drastically reduces network latency-the time it takes for data to travel-and is a critical component of a fast global site.
Comparative Analysis: Plugin vs. Cloud Service
Here’s where the Gatekeepers diverge. WP Rocket is a traditional WordPress plugin. All the optimization work-minifying files, creating cache pages-happens on your own web server.
Nitropack and RabbitLoader, on the other hand, are cloud-based services. When you install their plugin, it acts as a connector. They take copies of your assets, optimize them on their powerful, dedicated servers, and serve the optimized site to your visitors from their own built-in CDN. This means there is virtually zero performance impact on your own hosting server.
This philosophical difference is crucial. It creates a clear trade-off between control and convenience. WP Rocket gives an experienced user, like myself, an incredible amount of granular control. I can choose exactly which scripts to delay, which CSS files to combine, and fine-tune every aspect of the cache. This is powerful but can be complex and requires a willingness to test and debug potential conflicts.
Nitropack and RabbitLoader offer the ultimate convenience. Their “install and forget” approach automates almost everything. For a business owner who doesn’t want to touch a line of code and just wants a fast site, this is incredibly appealing. However, this automation comes at the cost of control. You’re trusting their algorithms to make the right optimization choices for your specific site, and debugging can be more opaque as the optimization is happening off-site.
Neither approach is inherently “better”-it depends entirely on your technical comfort level, your site’s complexity, and your specific needs. To make it clearer, here’s a breakdown:
| Feature | WP Rocket | Nitropack | RabbitLoader |
| Core Philosophy | On-Premise WordPress Plugin | Cloud-Based Optimization Service | Cloud-Based Optimization Service |
| Primary Function | Caching, File/Media Optimization | All-in-one cloud optimization | All-in-one cloud optimization |
| Server Load | All processing happens on your server | Zero impact on your server’s CPU/RAM | Processing offloaded to their servers |
| CDN | Integration with 3rd party CDNs or RocketCDN (add-on) | Built-in global Cloudflare CDN | Built-in global CDN with 300+ PoPs |
| Ease of Use | Very user-friendly, 3-min setup | “Install and forget” automated optimization | “Install and forget” automated optimization |
| Control vs. Automation | High degree of granular control over settings | Highly automated, less granular control | Highly automated, some rule-based control |
| Pricing Model | Annual subscription per site | Monthly/Annual based on pageviews/traffic | Monthly/Annual based on pageviews/traffic |
Ultimately, these tools are your first line of defense. Choose one, configure it well, and you will win the battle for the first impression. But to win the war for the entire user experience, you need a different kind of weapon.
The Guide: Crafting an Instantaneous User Journey with Smart Prefetch
Once a user is on your site, the performance game changes. It’s no longer about loading a page from scratch; it’s about transitioning between pages. This is where Smart Prefetch enters the picture. It’s a specialist tool that does one thing, and it does it exceptionally well: it makes navigation feel instant.
It’s not a competitor to the Gatekeepers. It’s a completely different class of tool that addresses Front #2: The User Journey.
Beyond Simple Prefetching: From Guesswork to Prediction
The concept of prefetching isn’t new. It’s the idea of loading the next page a user might visit before they actually click the link.
Early versions of this technology were crude. Some plugins would prefetch a link simply if a user hovered their mouse over it for 100 milliseconds. Others, like the popular Flying Pages plugin, would prefetch every single link that entered the browser’s viewport. While clever, these methods are essentially educated guesses. They often result in prefetching pages the user never visits, which wastes their bandwidth and can even cause network congestion on the browser’s end.
Smart Prefetch represents the next evolution: predictive prefetching. Instead of just guessing, it uses a data-driven AI model to predict the single most likely next page a user will visit. It does this by analyzing real, anonymized user navigation patterns from your site, along with contextual signals like the user’s device type, country, and network strength. It then uses this intelligence to prefetch only that one high-probability page. This is the same data-driven philosophy behind advanced projects like Google’s own Guess.js.
Technical Deep Dive: The Speculation Rules API
So how does it tell the browser to do this? This isn’t some proprietary hack. Smart Prefetch is built on a modern, standardized browser technology called the Speculation Rules API.
This API is a formal way for a website to give the browser hints about future navigations. When Smart Prefetch’s AI model makes a prediction (e.g., “from the homepage, there is a 75% chance the next click is to /services“), it doesn’t just jam a prefetch link into the page. It dynamically injects a JSON script into the page’s <head> that looks something like this:
HTML
<script type="speculationrules">
{
  "prefetch": [
    {
      "source": "document",
      "urls": ["/services/"]
    }
  ]
}
</script>
This is the clean, modern way to do it. The browser sees this rule and understands the instruction: “There’s a high probability the user will navigate to /services. When you have a spare moment and the network is idle, please fetch the HTML document for that page and store it in the cache at the lowest possible priority.”
This is the future of web performance. Major players like Cloudflare are using this exact API for their “Speed Brain” feature, which confirms this is the direction the web is heading.
This approach represents a fundamental shift in how we optimize navigation. Historically, a developer had to imperatively tell the browser what to do by manually adding <link rel="prefetch"> tags to specific pages. It was a static, manual process. Smart Prefetch operates on a higher level of abstraction. By installing it, you are declaratively telling the browser your goal: “I want to make navigation faster.” The AI model and the Speculation Rules API then handle the complex “how” in real-time, adapting as your users’ behavior changes over time. It’s a far more intelligent and scalable strategy.
Addressing the “What Ifs” (The Safety Net)
A smart developer always asks about the potential downsides.
- What if it slows down the current page? It won’t. By design, Smart Prefetch waits until all the critical, render-blocking resources of the current page have finished loading before it even thinks about initiating a prefetch. Furthermore, the browser itself treats
prefetchrequests with the “lowest” possible network priority, ensuring they never compete for bandwidth with more important assets. - What if it wastes my visitor’s data? This is the key advantage of a predictive model over a simple one. By prefetching only the single, most probable next page instead of every link in the viewport, it is inherently more conservative with data usage. Modern prefetching solutions also typically respect the
Save-Dataheader in browsers, giving users on restricted data plans an extra layer of protection. - What about privacy? This is crucial. To train its predictive model, the Smart Prefetch plugin sends anonymous data to its backend API. This includes the previous page URL, the current page URL, and non-identifying device information like screen type and network strength. It’s important to note that the plugin explicitly states it does not collect or transmit any personally identifiable information (PII). This transparency is essential for building trust.
The Symbiotic Stack: Why 1 + 1 = 3 for Your Core Web Vitals
This is the heart of the entire article. The most common question I see is, “Should I use WP Rocket or Smart Prefetch?” As I’ve said from the beginning, that’s the wrong question.
You don’t choose one or the other. You use a Gatekeeper then you use the Guide. You use WP Rocket to perfect the initial load, and then you layer Smart Prefetch on top to perfect the user journey. They are a symbiotic stack, operating at different stages of a user’s visit and targeting different Core Web Vitals.
Let’s walk through a complete user journey to see how this powerful combination works.
Step 1: User Clicks from Google (The Arrival)
- Tool in Charge: WP Rocket (or Nitropack/RabbitLoader).
- Action: A user clicks a link to your latest blog post from a Google search. The request hits your server. Instead of firing up WordPress, executing PHP, and querying the database, WP Rocket intercepts the request and instantly serves a pre-generated, static HTML file from its cache. The CSS and JS files it links to are already minified and optimized. The images are compressed. Your CDN delivers all these assets from a server physically close to the user.
- CWV Impact: This has a direct and massive positive impact on LCP. Because a static file is served and all assets are highly optimized, the largest contentful element on the page-usually a hero image or a block of text-appears on the screen incredibly quickly, easily meeting Google’s “Good” threshold of under 2.5 seconds. It also helps CLS by ensuring things like fonts are preloaded and images have their dimensions specified, preventing content from jumping around as it loads.
Step 2: User Reads the Page (The Engagement)
- Tool in Charge: Smart Prefetch.
- Action: The user is now on your site, reading the blog post. The browser’s main thread, which was busy rendering the page, is now largely idle. This is Smart Prefetch’s cue. Its lightweight script runs in the background. It sends the current URL (
/my-awesome-post/) and anonymous device data to its API. The API’s model, trained on your site’s traffic, responds with a prediction: “Users who read this post are most likely to click on/related-post-1/next.” Smart Prefetch then injects a speculation rule into the page toprefetchthe HTML document for/related-post-1/. This all happens silently, at the lowest network priority, without the user ever noticing. - CWV Impact: None on the current page. And that’s the point. It’s designed to be completely non-intrusive to the current viewing experience.
Step 3: User Clicks an Internal Link (The Navigation)
- Tool in Charge: The Browser, empowered by Smart Prefetch.
- Action: The user finishes the article and, as predicted, clicks the link to
/related-post-1/. The browser initiates the navigation. It prepares to make a network request to your server to fetch the HTML for that page. But then it checks its local cache first. And there it is. The complete HTML document for/related-post-1/is already downloaded and waiting, thanks to the prefetch that happened in Step 2. - The Magic: Instead of a round-trip to the server that could take hundreds of milliseconds (or even seconds on a slow connection), the browser serves the document instantly from its cache.
- CWV Impact: This is where the synergy pays off.
- Perceived Speed: For the user, the page transition is nearly instantaneous. There’s no white flash, no waiting. The experience feels incredibly fluid and responsive, which is a massive boost for user experience.
- Interaction to Next Paint (INP): This is the crucial technical benefit. INP measures the time from an interaction (the click) to the point where the browser paints the next frame of the new page. The biggest variable in this process is usually network latency-the time it takes to download the HTML for the next page (also known as Time to First Byte or TTFB). By completely eliminating this network latency, prefetching allows the browser to immediately start parsing the new page’s HTML, requesting its assets, and rendering the content. This dramatically reduces the amount of time the main thread is blocked on the new page, allowing it to become interactive and responsive far more quickly. A user’s first interaction on that newly navigated-to page is therefore much more likely to be fast, resulting in a good INP score for that interaction.
This combination creates a virtuous cycle. A fast initial load from WP Rocket prevents the user from bouncing, which gives Smart Prefetch the opportunity to work its magic. The instant navigation provided by Smart Prefetch then encourages the user to explore more pages, which is a powerful engagement signal that boosts session duration, increases conversion opportunities, and keeps users happy. The tools aren’t just additive; their effects are multiplicative.
From Milliseconds to Momentum: The Business Case for a Holistically Fast Site
At the end of the day, we don’t optimize for the sake of pretty scores; we optimize for business results. And the data connecting a holistically fast experience to the bottom line is undeniable.
We’ve all seen the stats about initial load time:
- A 1-second delay can cause a 7% reduction in conversions.
- Walmart found that for every 1-second improvement in page load time, their conversion rate increased by 2%.
- On mobile, conversions can plummet by up to 20% for every second of delay.
- The BBC discovered they lost 10% of their total users for every additional second their pages took to load.
These numbers are staggering, but it’s a mistake to think they only apply to the moment a user first lands on your site. A 1-second delay is a 1-second delay, and it’s just as frustrating when clicking from a product page to the checkout as it is when arriving from Google.
A site that feels snappy and responsive with every single click builds user confidence. It creates a perception of quality, professionalism, and reliability. A sluggish journey, even after a fast start, introduces friction and doubt at every step of the conversion funnel. For an e-commerce store, that hesitation can be the difference between a completed purchase and an abandoned cart. For a blog, it’s the difference between a reader who consumes five articles and one who leaves after the first. Instant navigation maintains a user’s “momentum,” keeping them engaged and moving toward your goal, whether it’s a sale, a lead, or just deeper engagement with your content.
Google’s entire Page Experience update is built on this premise. They want to rank sites that provide a superior user experience. A site that is fast not just on arrival, but throughout the entire session, provides a better experience. It improves all the key engagement metrics that search engines look at: lower bounce rates, higher pages per session, and longer time on site.
My Final Verdict: Stop Comparing, Start Combining
The debate was never about “WP Rocket vs. Smart Prefetch.” That’s like asking if you need a foundation or a roof for your house. You need both. They serve different, equally critical functions.
The conversation we should be having is about building a complete, two-front performance strategy. One that acknowledges the two distinct phases of a user’s visit and deploys the right specialist tool for each job.
Here is my recommended performance stack for techvigil.com and any other serious WordPress site in 2025 and beyond:
- Foundation: Start with high-quality, managed WordPress hosting. No plugin can fix a slow server.
- Initial Load (Front #1): Implement a comprehensive optimization suite. My personal preference is WP Rocket for its fantastic balance of power, user-friendliness, and granular control. For those who want a completely hands-off, automated solution and have the budget, Nitropack is an incredibly powerful alternative.
- User Journey (Front #2): Layer Smart Prefetch on top. Once your initial load is consistently fast and stable, install Smart Prefetch. It’s the finishing touch that transforms your site from just “fast to load” to “fast to use.” It’s what makes the entire experience feel premium and instantaneous.
Stop chasing a single score. Stop thinking about performance as a one-time event. Start optimizing the entire user journey. Your users-and your bottom line-will thank you for it.
Frequently Asked Questions (FAQ)
Q1: Can Smart Prefetch replace my caching plugin like WP Rocket?
Absolutely not, and this is the key takeaway of this entire post. They do completely different jobs. WP Rocket (and its alternatives) optimizes the initial load of a page by creating a static cache, minifying files, lazy loading images, and so on. It makes the first-page view incredibly fast. Smart Prefetch does nothing for that initial load; it optimizes the
navigation from one page to the next by intelligently predicting and pre-loading the next page’s HTML in the background. You need both for a complete performance solution.
Q2: What’s the difference between Smart Prefetch and WP Rocket’s “Preload Links” or “Preconnect” features?
There’s a huge difference in intelligence and function. WP Rocket’s old “Preload Links” feature was a simple browser hint: if a user hovered over a link for more than 100ms, it would start prefetching that page. This is a rudimentary guess, not a data-driven prediction. Their newer, automated “Preconnect” feature is entirely different; its job is to warm up the connection (DNS lookup, TCP handshake, TLS negotiation) to external domains your site uses, like
fonts.googleapis.com or connect.facebook.net. It doesn’t actually download any content from those domains, it just makes the eventual request faster. Smart Prefetch, by contrast, uses a sophisticated AI model to predict the most likely specific internal page you’ll visit next and then uses the Speculation Rules API to download the actual HTML document for that page, making the subsequent navigation feel instant.
Q3: Will predictive prefetching use too much of my visitors’ data or slow down their connection?
This is a valid concern that has been carefully addressed by modern prefetching technology. First, Smart Prefetch is highly efficient because it only prefetches one predicted URL, not every link it sees, which drastically reduces wasted data compared to older methods. Second, the browser itself is smart about this. It treats prefetch hints with the “lowest” possible network priority, meaning it will never delay or steal bandwidth from the critical resources needed to render the page you are currently viewing. Finally, modern prefetching libraries and browsers often respect the
Save-Data header, giving users on limited data plans an automatic opt-out.
Q4: Is Smart Prefetch compatible with caching plugins and CDNs?
Yes, it’s designed to be fully compatible and, in fact, synergistic. Smart Prefetch only begins its work after the initial page has been fully loaded and served by your caching plugin and CDN. They don’t conflict because they operate at different times. The synergy comes from the fact that the prefetch request for the next page’s HTML will be served by your cache and/or CDN, just like any other request. This means the prefetch itself is also lightning-fast, making the whole system even more efficient.
Q5: Does Smart Prefetch actually improve Core Web Vitals?
Yes, but in a very specific and important way that complements caching plugins. While a tool like WP Rocket has a massive, direct impact on LCP for the initial page load, Smart Prefetch’s primary impact is on the perceived performance of navigation and the INP of the navigated-to page. By pre-loading the next page’s HTML, it eliminates network latency from the navigation process. This allows the browser to start rendering the next page much faster, which reduces main-thread contention and allows user interactions on that new page (like clicking a button or opening a menu) to be handled more quickly. This directly contributes to a better INP score for the user’s entire session, making your whole site feel more responsive
Leave a Reply
You must be logged in to post a comment.